
You can use the "Choice" activity like a clicker.
- From "Add an activity or resource", click "Choice".
- Enter a "Choice name" (required).
- Enter the question in the "Description" field.
- Select how to display the options.
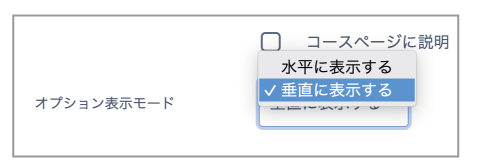
Option settings
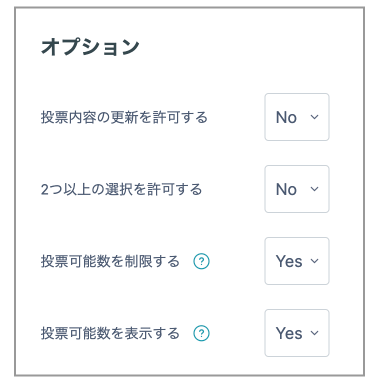
- Allow choice to be updated: When set to "Yes", students can change their mind and update their selection.
- Allow more than one choice to be selected: When set to "Yes", checkboxes are displayed instead of radio buttons.
-
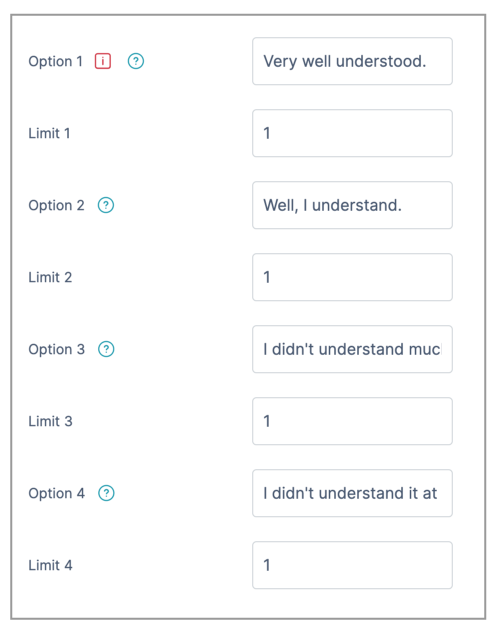
Limit the number of responses allowed: When set to "Yes", you can limit the number of responses for an option. Enter the limit in each option's "Limit" box.
_Note:_ If no number is entered, students cannot select the option.
Show available spaces: If the number of responses allowed is limited, setting this to "Yes" shows participants each option's limit and the number of responses made so far.
Entering options
- If "Limit the number of responses allowed" is set to "Yes", enter a number in the "Limit" box.
- If there are not enough input fields, click "Add 3 fields to form".
(Blank fields are ignored)
Results settings
Configure whether to release results to students.
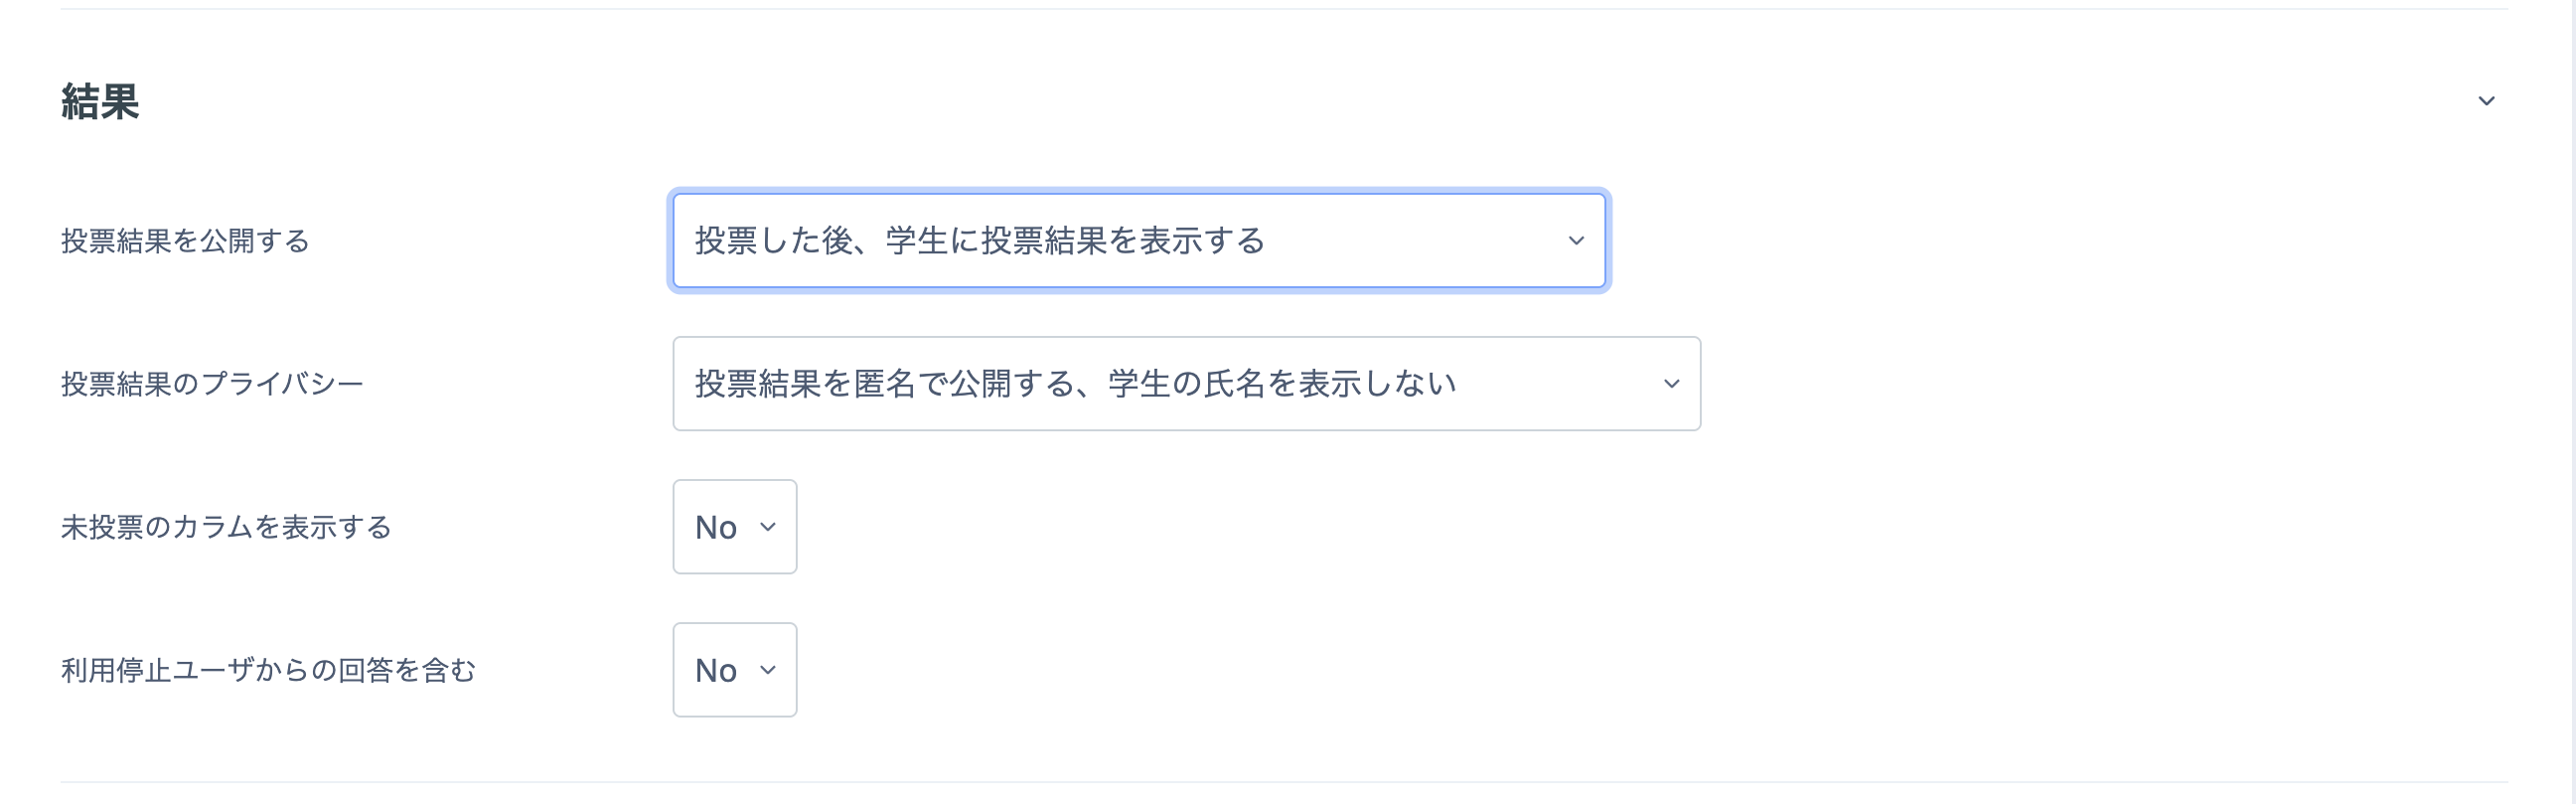
- If you select anything other than "Do not publish results to students", choose whether results should be anonymous.

- When you have finished the required settings, click "Save and display".
Teachers can view the results at any time. Click "View chart data" to display a chart of the Choice results below.
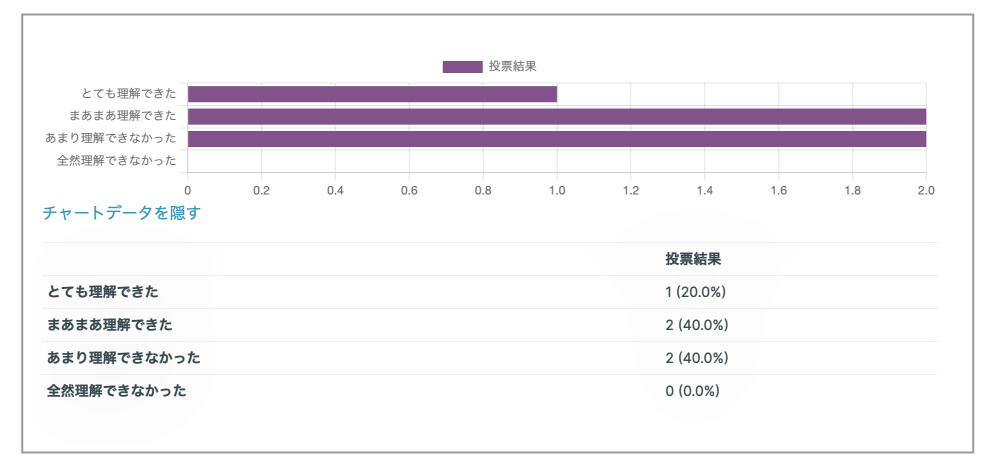
Viewing Choice results
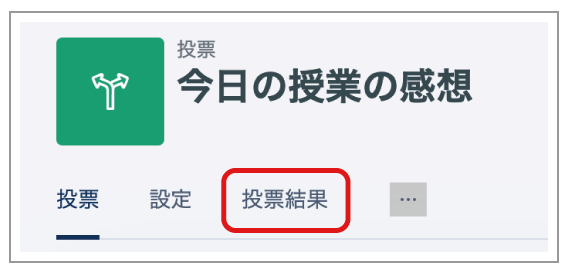
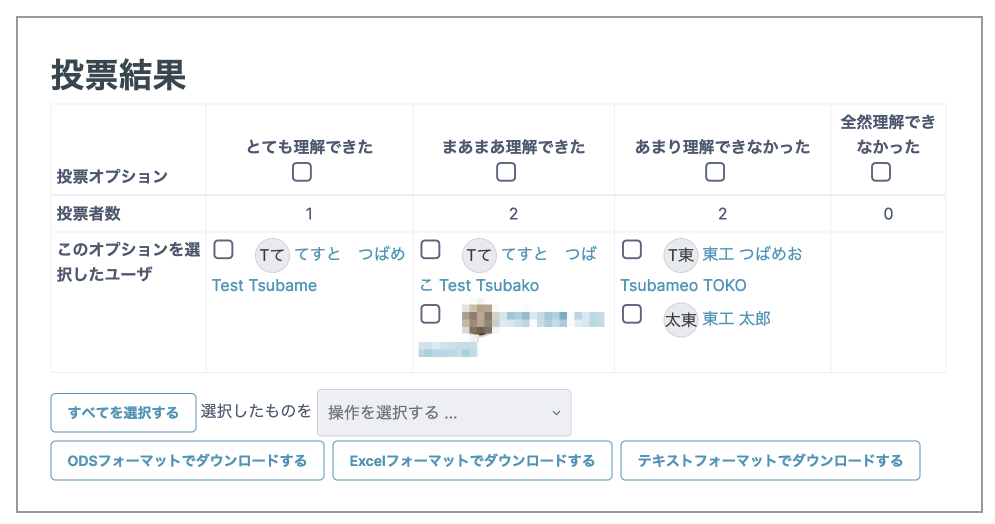
- Click "View results" to see the result details.
- Use any of the three "Download" buttons at the bottom of the page to download the Choice results in your preferred format.
Deleting an individual response
- To delete an answered item individually, select the relevant item and click "Delete".
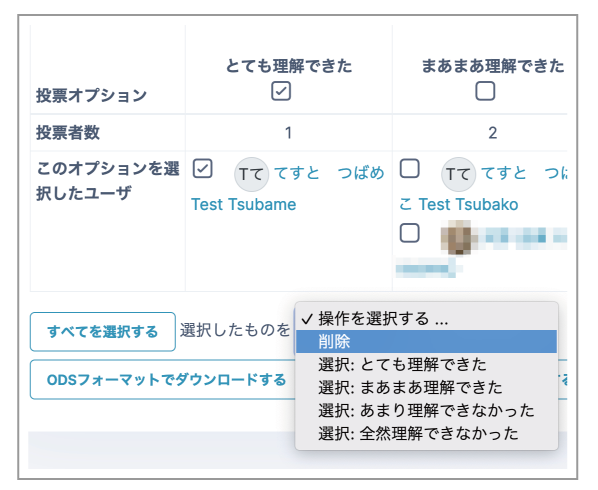
The student will no longer have a response for that item and can make their choice again.