
- Click "Questions" -> "Add question". Select the desired type from the "Add question" drop-down menu.
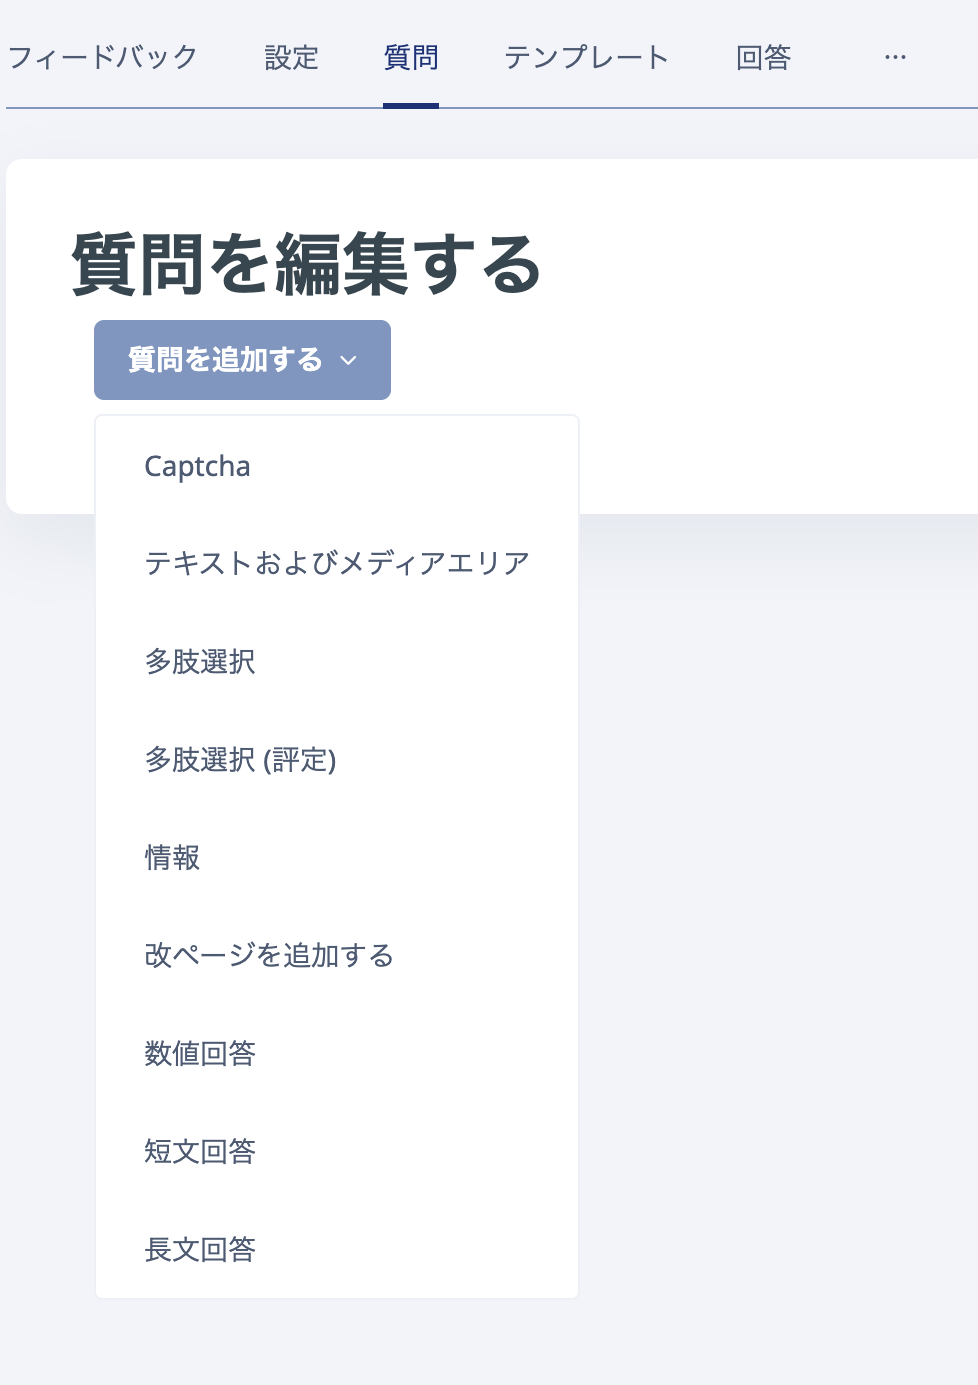
- Label: Select this when you want to add a label, such as an explanation of a question.
- Multiple choice: A multiple-choice question.
- Multiple choice (rated): You can assign grades to the multiple-choice options and show the result as an average score. These grades are not reflected in students' grades.
- Information: Displays response time and course information.
- Response time: Displays the date and time of the response.
- Course: Displays the course short name (course code) of the relevant course.
- Course category: Displays the course category to which the relevant course belongs.
- Add page break: Inserts a new page.
- Numeric answer: Requires an integer answer within the specified range.
- Short text answer: Lets you limit the number of characters entered. Responses are limited to one line and cannot contain a line break.
Note: Pressing the Return (Enter) key in a Short text answer field submits the response immediately, which may cause students to submit at an unintended time. For free-text responses, we recommend using "Longer text answer".
- Longer text answer: Lets respondents enter text across multiple lines, for example for free-text responses.
The following explains how to configure the main question types.
Multiple choice
This explains how to configure a question when "Multiple choice" is selected in "Add question".
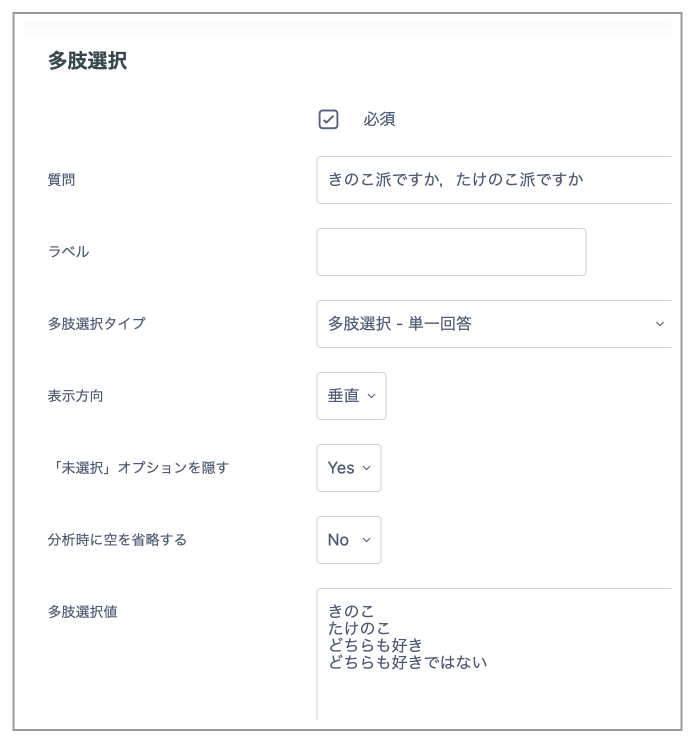
- Required: Select this checkbox to make a response required.
- Question: Enter the question text.
- Label: Use this when you want to divide the form into sections or when the next question displayed differs according to the response. The text entered is displayed in parentheses before the question text.
- Multiple choice type: Select the response format.
- Multiple choice - single answer: Select one option from radio buttons.
- Multiple choice - multiple answers: Select multiple options from checkboxes.
- Multiple choice - single answer (drop-down menu): Select one option from a drop-down menu.
- Display direction: Select whether options are displayed "Vertically" or "Horizontally".
- Hide the "Not selected" option.
- Yes: Do not display "Not selected" among the options.
- No: Display "Not selected" among the options.
Note: If "Required" is selected and this item is set to "No", a respondent who selects "Not selected" cannot proceed to the next question.
- Do not analyse empty submissions: If "Not selected" is displayed and a response is "Not selected", or the respondent submits without selecting anything, do not count it as a response.
- Multiple choice values: Enter the response options. If there are multiple options, enter each option on a separate line.
- Position: Set the order in which this question is displayed. You can change it even after entering all questions.
- When you have finished configuring the settings, click the "Save question" button at the bottom of the page.
Longer text answer
This explains how to configure a question when "Longer text answer" is selected in "Add question".
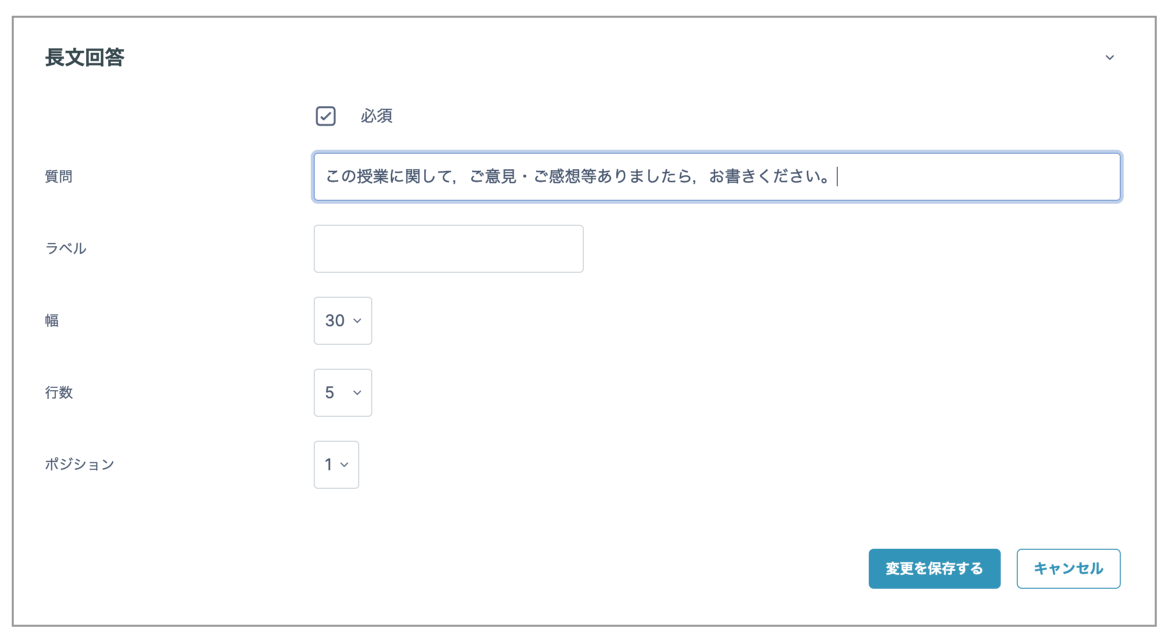
- Required: Select this checkbox to make a response required.
- Question: Enter the question text.
- Label: Use this when you want to divide the form into sections or when the next question displayed differs according to the response. The text entered is displayed in parentheses before the question text.
- Width: Set the width of the response field. A value of approximately 30 to 50 is recommended.
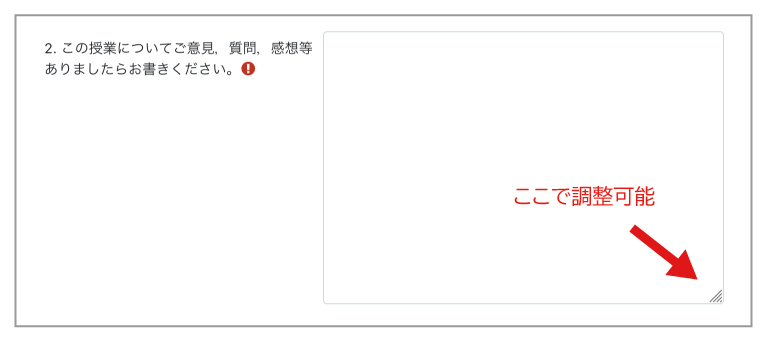
- Lines: Set the number of lines in the response field when the Feedback activity is displayed. However, users can drag the bottom-right corner of the response field to change its height, so they can make it larger than the configured value.
- Position: Set the order in which this question is displayed. You can change it even after entering all questions.
- When you have finished configuring the settings, click "Save changes" at the bottom of the page.
Checking Questions and Saving a Template
The Feedback form is displayed on the Feedback page.
You can rearrange questions using the four-way arrow icon.
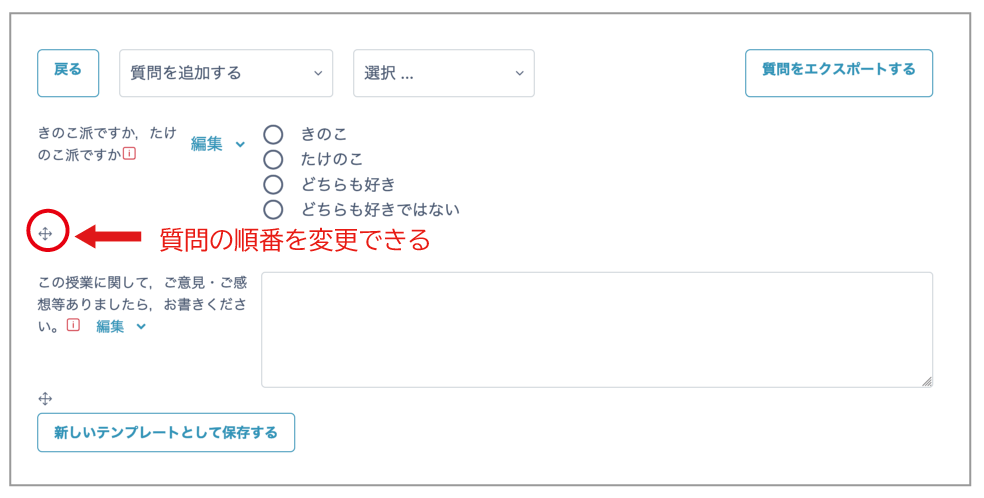
To save this Feedback activity as a template, click "Save as new template".
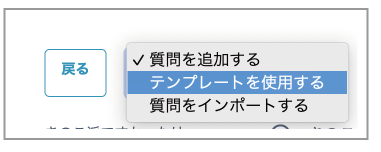
A saved template can be used when creating another Feedback activity.
For instructions on branching questions based on responses, see this FAQ.